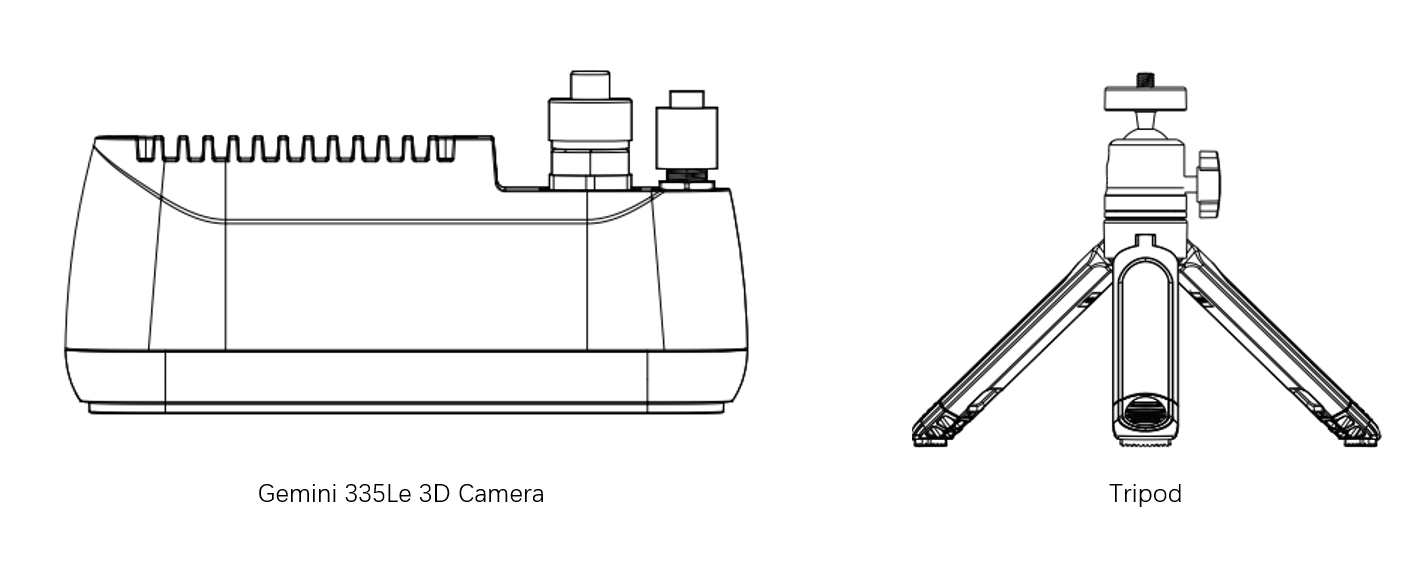
WHAT’S IN THE BOX?


CONNECTING THE ORBBEC CAMERA
A.Connecting the camera using PoE (Power over Ethernet) for power supply.
- Secure the camera onto the tripod, as illustrated in Step 1 below.
- If a PoE switch is available, the camera can be powered via the same Ethernet (M12) data cable used for data transfer.
- Remove the camera’s M12 interface protective cover and connect the Data cable to the M12 interface on the camera.
- Plug the RJ45 end of the data cable into the PoE Switch.
- Connect the host to the PoE switch using a standard RJ45 Ethernet cable (the port used for
the PC connection does not need to be PoE capable).

B.Connecting the camera using a DC power supply.
- Secure the camera onto the tripod, as illustrated in Step 1 below.
- Remove the camera’s M12 interface protective cover and connect the Data cable to the M12 interface on the camera.
- Remove the camera’s M8 interface protective cover and connect the Power cable to the M8 interface on the camera.
- Use the red-labeled “POWER IN 9-24V” pin and the black-labeled “POWER GND” pin to connect a 9-24V DC power source.
- Plug the RJ45 end of the data cable into the host or the network gateway to which the host is connected.

GET ORBBEC VIEWER
Select and download the corresponding Orbbec Viewer based on your system and version.
https://www.orbbec.com/developers/orbbec-sdk/

ENVIRONMENT PREPARATION INSTRUCTIONS
For detailed network environment configuration instructions, please refer to https://www.orbbec.com/docs/gemini-335le-quick-start/
LAUNCHING ORBBEC VIEWER
For detailed instructions, please refer to the Orbbec Viewer tutorial video below .
https://www.youtube.com/@Orbbec3d

Network Environment Configuration on the Linux platform
1. Environment preparation
1.1 Linux x86_64 /Arm64 Ubuntu 20.04+;
1.2 Connect directly using either the Ethernet port on the host/switch or through a USB-to-Ethernet adapter.
2. Environment configuration
The default IP address for the Gemini 335Le device is 192.168.1.10. The device can be directly connected to the host or via a network switch. Please adjust the host’s local network interface to be on the same network segment as the Gemini 335Le device for proper recognition. Once the sub-net is adjusted, you can access the Gemini 335Le network device using the Orbbec Viewer tool or SDK.
Modify the local network segment to match the same sub-net as the Gemini 335Le device.

3. Recommend Configuration
(1) If, after configuring the network environment as described in section “2.2”, the Orbbec Viewer tool fails to recognize the Gemini 335Le network device, you should check whether the Wi-Fi connection is enabled. If Wi-Fi is enabled, it needs to be turned off first. Then, re-enable the local network connection or power cycle the network device, and it should be recognized.

(2) Due to differences in system networks and power management across platforms, packet loss may occur to varying degrees during the process of stream capture on the host machine, which can result in the frame rate not meeting expectations. Therefore, before using the Gemini 335Le device on different platforms, it is essential to configure and verify the platform and system settings to avoid issues like frame loss.
Computer power configuration:

Computer network card configuration:

Firewall Configuration:
The firewall on Ubuntu is disabled by default. Ubuntu uses Uncomplicated Firewall (UFW) as the default firewall management tool, and UFW is disabled by default. If it is enabled, the user needs to manually configure it to be turned off. Before using Orbbec Viewer, make sure that the firewall is disabled.
4. Start Orbbec Viewer Experience
Once the environment and configurations are properly set up as described in the prevouse sections, you can start experiencing the Gemini 335Le by launching the provided Orbbec Viewer tool for Linux/Arm platforms, as shown in the image below:
Open the Orbbec Viewer tool, select the Gemini 335Le network device you want to open, and click Open:

Once the device is successfully loaded, the detailed functionality window will appear, allowing you to start the experience: